
Table of Contents
Are you tired of those overly sugary, overly processed protein bars lining the shelves? Do you crave a healthier, more delicious way to fuel your body and satisfy those snack cravings? Then get ready to ditch the store-bought options and embark on a journey of flavor and fitness with our ultimate guide to low-fat homemade protein bars! In this article, we'll walk you through everything you need to know to create your own customized protein bars, tailored to your taste preferences and dietary needs. We'll explore the best low-fat ingredients to use, providing you with expert tips and tricks for achieving that perfect texture and mouthwatering taste. Forget the complicated recipes and confusing instructions; we'll demystify the process, making it easy for even the most novice baker to whip up a batch of these healthy treats. From classic flavors to exciting variations, we'll show you how to create low-fat homemade protein bars that are not only good for you but also incredibly satisfying. Prepare to discover a world of delicious possibilities and transform your snacking game forever! Get ready to experience the joy of crafting your own perfect low-fat homemade protein bars – your taste buds (and your waistline) will thank you.
Crafting Delicious LowFat Homemade Protein Bars
Crafting Delicious LowFat Homemade Protein Bars
Getting Started: The Foundation of Flavor
So, you're diving into the world of low-fat homemade protein bars? Fantastic! It’s a rewarding journey, trust me. The first thing to remember is that "low-fat" doesn't mean flavorless. We're aiming for delicious *and* healthy. Think of it like this: it's not about deprivation, it's about mindful choices. We'll be using ingredients that pack a nutritional punch without relying on excessive fats to carry the flavor. This means focusing on protein powder as your base, a good source of sweetness (like honey or maple syrup), and binding agents that provide structure without adding unwanted calories. The key is balance – a harmonious blend of taste and nutrition. Don't be afraid to experiment! Find what you enjoy and what works best for your body.
One of the biggest hurdles new protein bar makers face is texture. Nobody wants a crumbly, dry bar that falls apart the second you bite into it. The trick lies in the right balance of wet and dry ingredients. Too much liquid, and your bars will be sticky messes; too little, and they'll be dry and disappointing. We'll explore various techniques for achieving that perfect, slightly chewy texture—the kind that satisfies your cravings without leaving you feeling weighed down. Remember, practice makes perfect; don't be discouraged if your first attempt isn't flawless. Each batch is a learning opportunity.
Ingredient Category | Examples | Low-Fat Considerations |
|---|---|---|
Protein Powder | Whey, casein, soy, brown rice | Choose options with lower fat content per serving |
Sweetener | Honey, maple syrup, stevia | Use sparingly to control overall calories and fat |
Binding Agent | Oat flour, chia seeds, coconut flour | Oat flour and coconut flour are naturally low in fat |
Building Flavor Profiles: Beyond the Basics
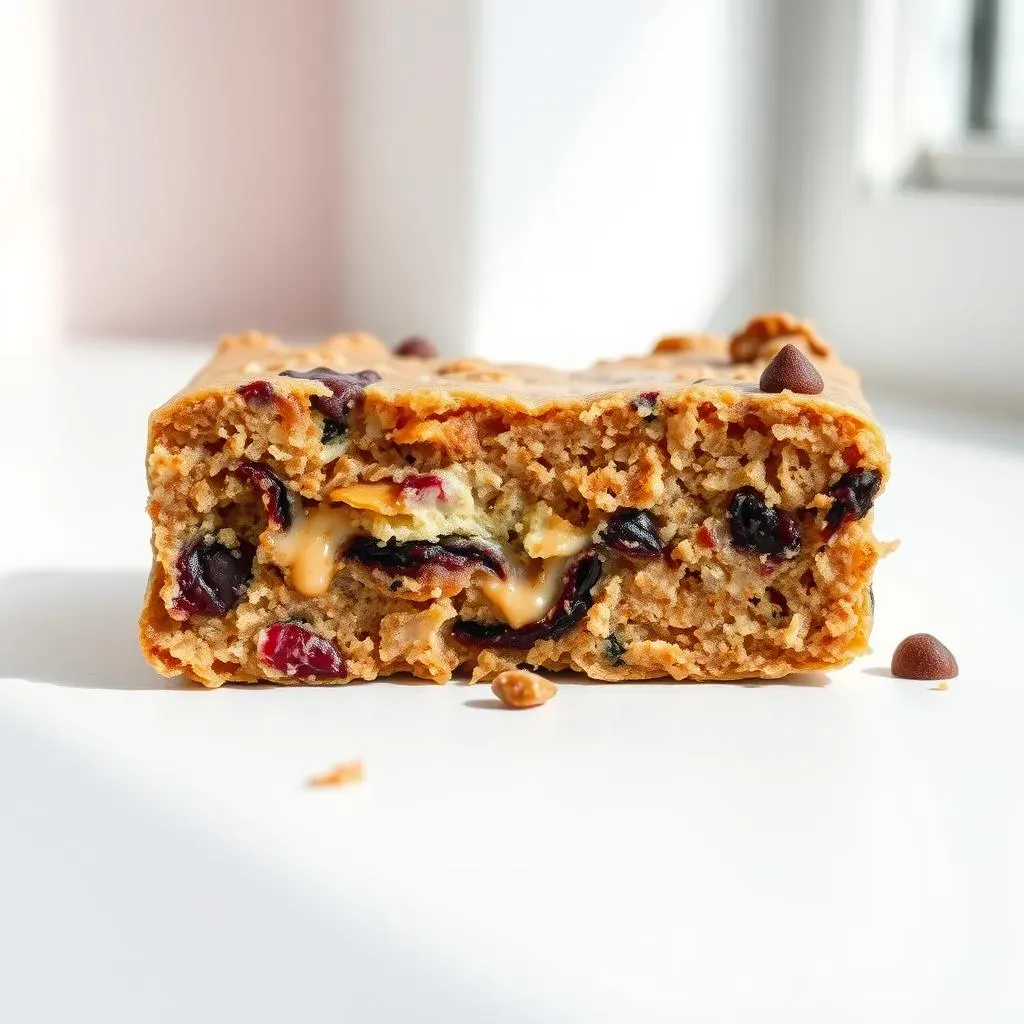
Now for the fun part: experimenting with flavor! The beauty of homemade protein bars is the endless customization possibilities. Forget those limited store-bought options; you’re the chef here. Think about your favorite flavor combinations and how you can incorporate them into your bars. Do you crave chocolate? Fantastic! Use unsweetened cocoa powder and a touch of your favorite sweetener. Love peanut butter? Opt for a natural, low-fat variety. Fancy something fruity? Dried cranberries, blueberries, or chopped apricots add a burst of flavor and sweetness without adding excessive fat. The possibilities are truly limitless.
Don't be afraid to get creative! Think about adding spices like cinnamon, nutmeg, or ginger for an extra layer of complexity. A dash of vanilla extract can elevate your bars to a whole new level of deliciousness. Consider adding nuts (in moderation, of course, as they are higher in fat), seeds, or even a sprinkle of sea salt for a sophisticated touch. Remember, the key is to balance flavors and textures to create a truly unforgettable protein bar experience. Once you've mastered the basics, you'll be amazed at what you can create. So, grab your apron, gather your ingredients, and let's get baking!
- Chocolate Peanut Butter
- Fruity Oat Crunch
- Coconut Almond Bliss
- Spicy Cinnamon Swirl
- Mint Chocolate Chip
Ingredient Spotlight: Choosing LowFat Options for Your Bars
Ingredient Spotlight: Choosing LowFat Options for Your Bars
Protein Powder Power: Choosing the Right Base
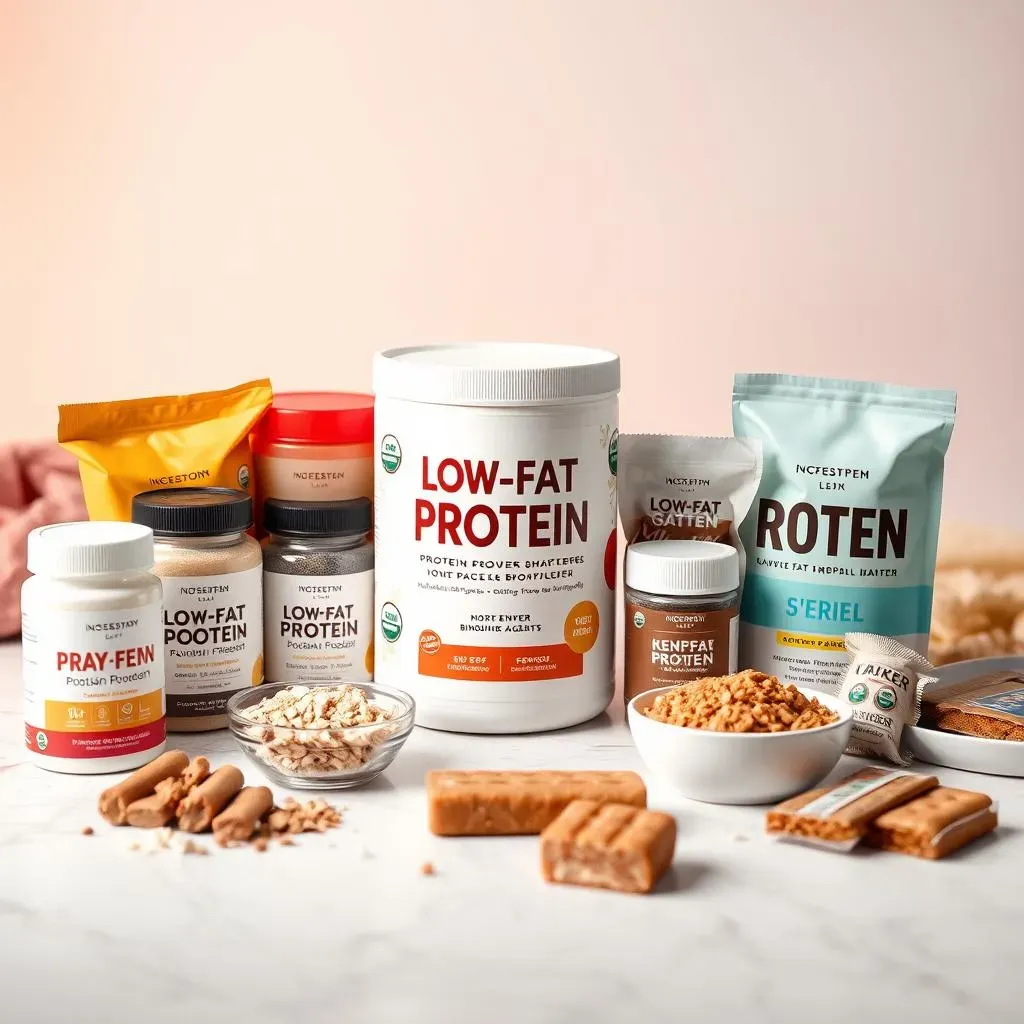
Let's talk protein powder—the star of our low-fat protein bar show! The market's brimming with options, but not all are created equal, especially when it comes to fat content. Look for powders that boast a low fat-per-serving count. Whey protein is a popular choice, often offering a good balance of protein and low fat. Casein protein, known for its slower digestion, can also be a great option. If you're vegan or have dairy sensitivities, soy, brown rice, pea, or even a blend, are excellent lower-fat alternatives. Always check the nutrition label before buying; those numbers don't lie! Pay close attention to serving size to avoid miscalculations.
Remember, the type of protein powder you choose can impact the final texture of your bars. Some powders are naturally drier than others, so you might need to adjust the amount of liquid in your recipe accordingly. Experimentation is key! Don't be afraid to try different brands and types of protein powder to find your perfect match. A little trial and error will lead you to delicious success. Think of it as a culinary adventure, not a chore.
Protein Powder Type | Typical Fat Content (per serving) | Texture Considerations |
|---|---|---|
Whey | Low to moderate | Can be slightly dry, may need extra liquid |
Casein | Low to moderate | Creamier texture, less likely to need extra liquid |
Soy | Low | Can be slightly grainy, best blended well |
Brown Rice | Low | Mild flavor, good for blending with other powders |
Sweetening the Deal: Low-Fat Sweeteners
Next up: sweetness! We want our bars to taste amazing, but we're not adding a ton of fat to achieve that. Honey and maple syrup are natural sweeteners that add a touch of moisture and subtle flavor. They're not completely fat-free, but they’re significantly lower in fat compared to many other options. Use them sparingly, focusing on enhancing the other flavors rather than overpowering them. A little goes a long way! Consider adding a pinch of salt to balance the sweetness; it's a chef's secret weapon.
Other low-fat options include stevia, monk fruit, or erythritol. These are sugar alcohols that are far less calorie-dense than traditional sugar, and many are fat-free. However, be mindful of the potential digestive side effects that can occur with large quantities of some sugar alcohols. Always start with a small amount and adjust to your preference. Remember, the goal is to create a delightful balance—a sweet treat without the fat overload. Taste as you go! Adjust your sweetness according to your personal preferences. The perfect level of sweetness is subjective.
- Honey
- Maple Syrup
- Stevia
- Monk Fruit
- Erythritol
Fat-Conscious Binding: The Structural Elements
Lastly, let's talk about binding agents – the unsung heroes of protein bar texture. These ingredients help hold your bars together and give them that satisfying chew. Oat flour and coconut flour are fantastic, naturally low-fat choices. They add a subtle flavor and help create a moist, cohesive bar. Chia seeds are another excellent option; they're packed with nutrients and have a slightly gelatinous quality when mixed with liquid, which acts as a natural binder. They’re a sneaky way to add more nutrition and texture to your bars without increasing the fat content too much.
While nuts and seeds can add flavor and texture, remember they're higher in fat. Use them sparingly if you're aiming for a truly low-fat bar. A small amount can go a long way in terms of flavor and texture. Consider using them as toppings rather than incorporating large amounts directly into the bar mixture. The key is mindful ingredient selection. Prioritize low-fat options for the base of your bars, and use higher-fat ingredients as accents to enhance flavor and texture.
Mastering the Mix: Techniques for LowFat Protein Bar Perfection
Mastering the Mix: Techniques for LowFat Protein Bar Perfection
The Art of the Blend: Achieving the Perfect Consistency
Alright, friend, let's talk technique. You've got your low-fat ingredients picked out – fantastic! Now, it's all about the *how*. The key to amazing low-fat protein bars isn't just about ingredient selection; it's about mastering the blending process. Think of it as a delicate dance between wet and dry ingredients. Too much liquid, and you end up with a sticky, gooey mess that's impossible to handle. Too little, and your bars will be dry and crumbly, like a disappointing afterthought. The goal is that perfect, slightly chewy texture—a balance that holds its shape without being overly dense.
I recommend starting with a good quality food processor or a powerful blender. A hand mixer can work in a pinch, but it might not provide the same level of consistency. Begin by combining your dry ingredients – protein powder, oat flour, coconut flour, chia seeds, etc. – in your chosen appliance. Pulse a few times to ensure everything is evenly distributed. Then, gradually add your wet ingredients – sweetener, any liquid (like a little milk or water if needed), and flavorings. Process until everything is well combined and forms a sticky, but workable dough. Don't over-process; you want a slightly coarse texture, not a perfectly smooth paste.
Step | Action | Tip |
|---|---|---|
1 | Combine dry ingredients | Pulse gently to avoid creating dust |
2 | Gradually add wet ingredients | Start with less liquid than you think you need |
3 | Process until combined | Don't over-process; a slightly coarse texture is ideal |
Pressing and Shaping: From Dough to Delight
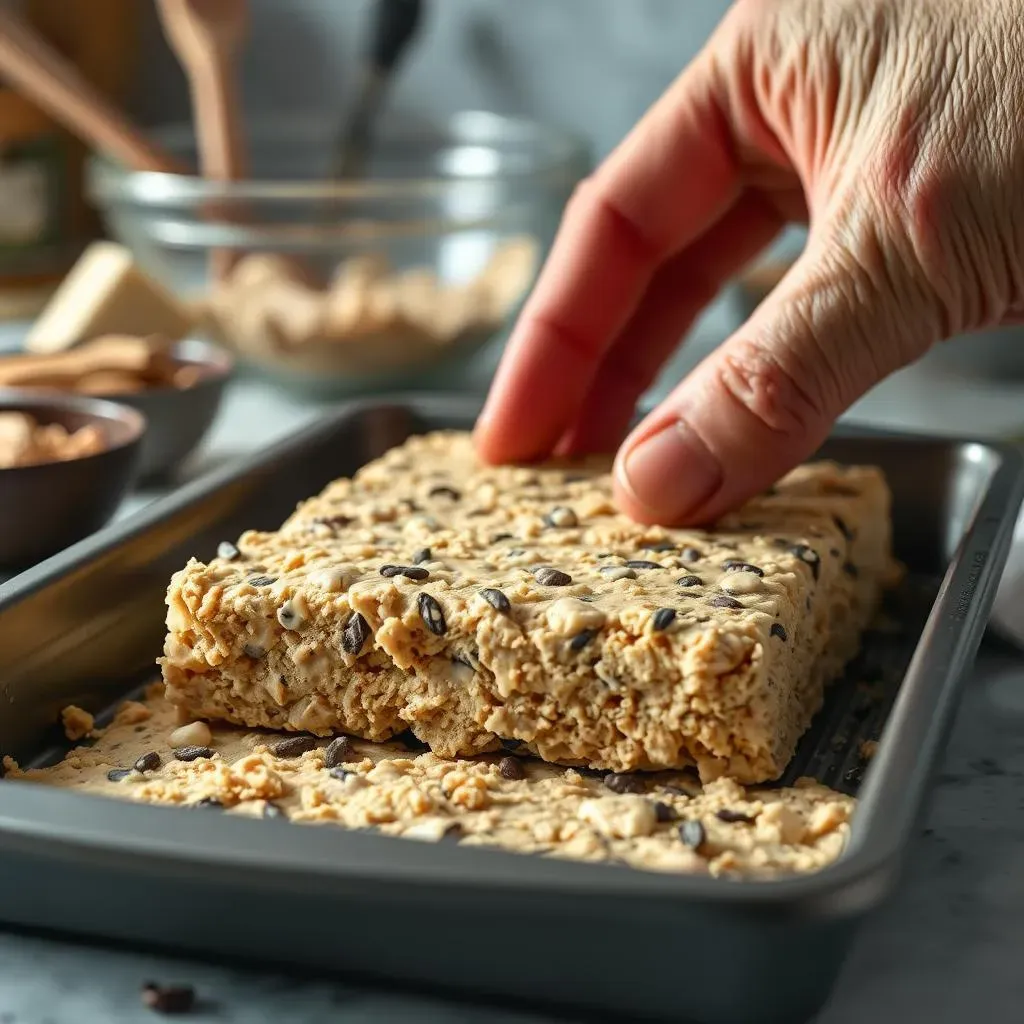
Once your mixture reaches the perfect consistency, it's time to press it into your baking pan. Line your pan with parchment paper first; this makes removing the bars a breeze. Press the mixture firmly and evenly into the pan. You want a compact, uniform layer. A flat-bottomed glass or measuring cup works wonders for achieving this. Don't be shy; really press down to create a dense, cohesive bar. A slightly uneven surface adds character; nobody's looking for perfection here.
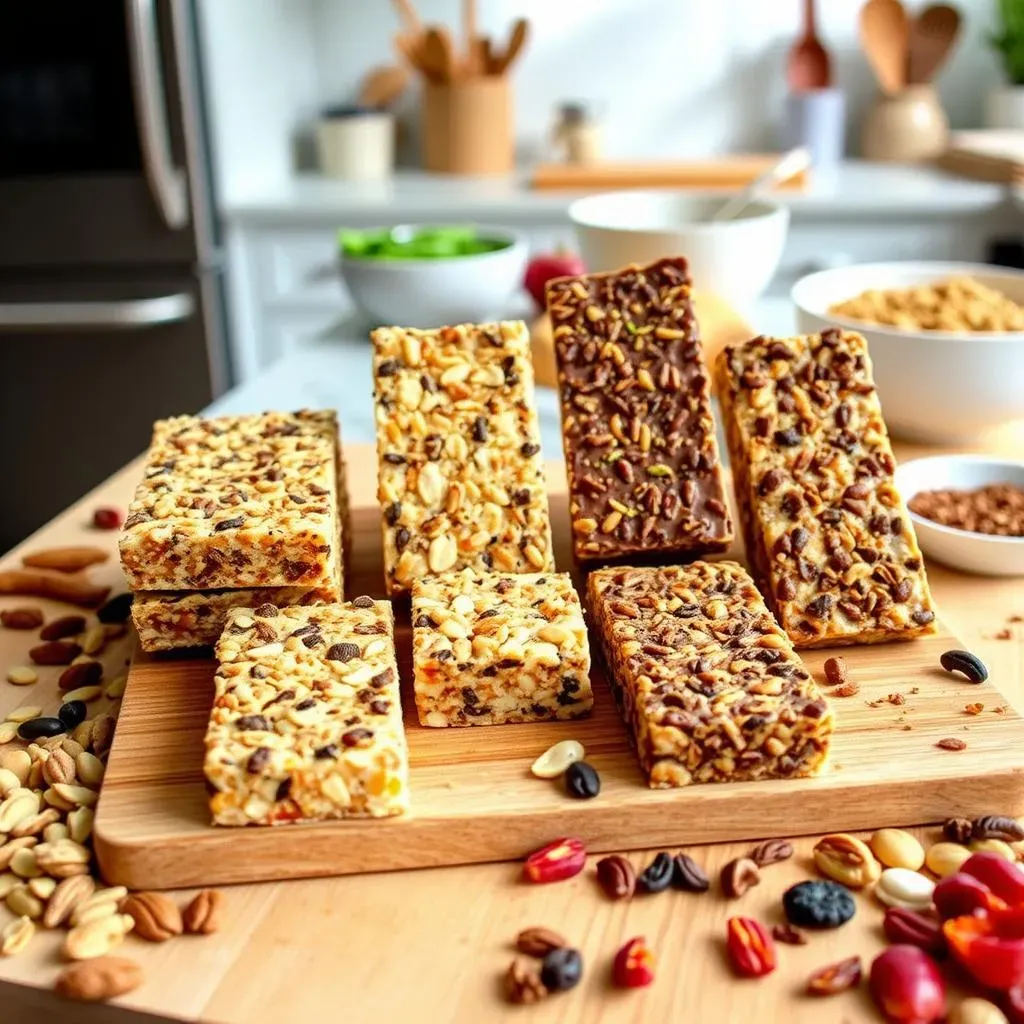
After pressing, refrigerate the pan for at least two hours, or preferably overnight. This allows the bars to set completely and develop their texture. Once chilled, you can easily lift the bars out of the pan using the parchment paper. Cut them into your desired size and shape. You can get creative here! Squares, rectangles, even fun shapes using cookie cutters are all possibilities. The possibilities are endless, and the process is quite simple. Once cut, you can store them in the refrigerator for up to a week or freeze them for longer storage.
- Line your pan with parchment paper
- Press the mixture firmly and evenly
- Refrigerate for at least two hours
- Cut into desired shapes
Beyond the Basics: Delicious LowFat Homemade Protein Bar Variations
Beyond the Basics: Delicious LowFat Homemade Protein Bar Variations
Sweet & Savory Sensations: Expanding Your Flavor Palette
Okay, so you've mastered the basic low-fat protein bar recipe. That's awesome! But let's not stop there. The real fun begins when you start experimenting with different flavor combinations. Think outside the box! Don't be afraid to combine unexpected ingredients. Imagine a sweet and salty masterpiece: a dark chocolate bar studded with sea salt and crunchy almonds (use sparingly, remember, we're aiming for low-fat!). Or perhaps a zesty citrus twist—a lemon poppy seed protein bar with a hint of honey. The possibilities are truly endless.
Consider incorporating spices to add depth and complexity. A dash of cinnamon, nutmeg, or even a pinch of cardamom can transform a simple bar into something truly special. Think about seasonal ingredients too. During summer, try adding fresh berries or a touch of coconut. In the fall, explore pumpkin spice or warming applesauce. Remember, this is your chance to get creative and personalize your bars to reflect your unique tastes. It’s a culinary adventure, not a science experiment! The more you experiment, the better your bars will become.
Flavor Profile | Key Ingredients | Low-Fat Considerations |
|---|---|---|
Sweet & Salty | Dark chocolate, sea salt, almonds | Use dark chocolate with high cocoa content, minimal almonds |
Zesty Citrus | Lemon zest, poppy seeds, honey | Use fresh lemon zest for maximum flavor |
Pumpkin Spice | Pumpkin puree, cinnamon, nutmeg | Use unsweetened pumpkin puree |
Dietary Delights: Catering to Specific Needs
One of the beautiful things about making your own protein bars is the ability to tailor them to specific dietary needs. Are you gluten-free? No problem! Simply use gluten-free oats or alternative flours like almond flour or coconut flour. Vegan? Choose a vegan protein powder and ensure all your other ingredients are plant-based. Looking for a low-sugar option? Experiment with sugar alcohols like stevia or monk fruit, but remember to check for potential digestive side effects. The possibilities are vast, and the process is surprisingly simple.
Don't let dietary restrictions limit your creativity! There are many delicious and healthy alternatives available to create amazing low-fat protein bars that cater to any dietary preference. Remember to always double-check ingredient labels to ensure they meet your specific requirements. Online resources and communities dedicated to specific diets are great places to find inspiration and helpful tips. The key is to be mindful of what you're using and to always prioritize quality ingredients that align with your dietary needs. Ultimately, the goal is to create a delicious and healthy treat that you can enjoy without compromise.
- Gluten-Free: Use gluten-free oats or alternative flours
- Vegan: Choose vegan protein powder and plant-based ingredients
- Low-Sugar: Use sugar alcohols like stevia or monk fruit
- Nut-Free: Substitute sunflower seed butter or tahini for nut butters