Table of Contents
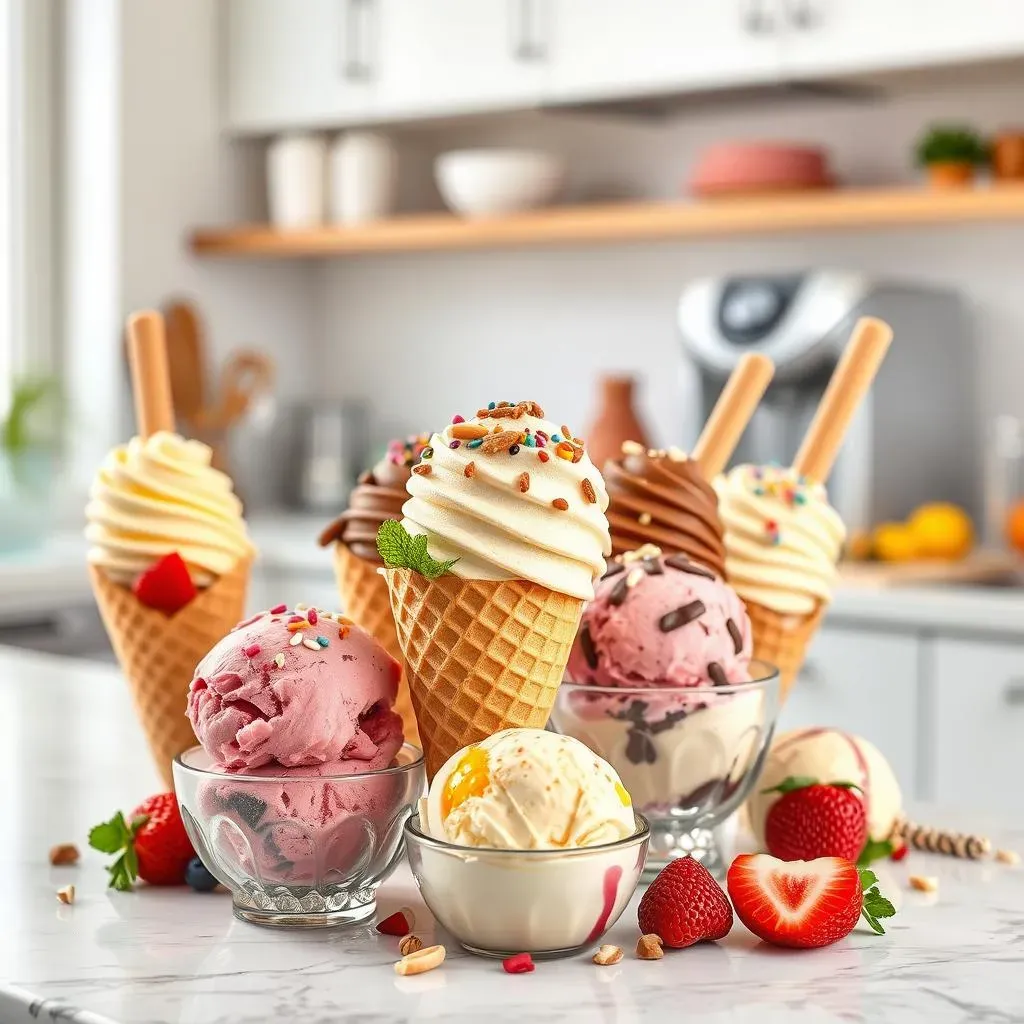
Ever dream of indulging in creamy, dreamy ice cream without the guilt? Me too! That's why I've been on a mission to create the best low fat ice cream recipes for ice cream makers. Forget those store-bought tubs loaded with sugar and mystery ingredients. We're diving into the world of homemade goodness, where you control everything from the sweetness to the flavor. This isn't about depriving yourself; it's about smart swaps that let you enjoy your favorite treat without sacrificing taste. In this guide, we'll explore why low fat ice cream is a game changer, what key ingredients you'll need, and how to whip up your own frozen masterpieces. We'll also tackle common issues and give you the inside scoop to become a low-fat ice cream pro using your ice cream maker. Get ready to transform your kitchen into an ice cream parlor – the healthy way!
Why Low Fat Ice Cream Recipes Are Your New Best Friend

Why Low Fat Ice Cream Recipes Are Your New Best Friend
The Guilt-Free Indulgence
Let's be real, ice cream is amazing. But sometimes, that heavy, full-fat version leaves you feeling like you need a nap. Low fat ice cream is where it's at because it lets you have your cake, er, ice cream, and eat it too. We're talking all the flavor, all the satisfaction, without the sluggish feeling afterward. It's about enjoying a treat without derailing your healthy lifestyle. Think of it like this: it's the superhero version of dessert, swooping in to save the day without the extra baggage.
Controlling What You Eat
Have you ever looked at the ingredients list of some store-bought ice cream? It can be a bit scary. With homemade low fat recipes, you're the boss. You decide what goes in, which means you can ditch the artificial sweeteners, the mystery additives, and excess sugars. It's a great way to make sure that what you are eating is not only delicious but also aligns with what you want to put into your body. Plus, it's fun to get creative with flavors and mix-ins. You can go as wild or as simple as you like. The power is in your hands.
Benefit | Description |
|---|---|
Reduced Guilt | Enjoy ice cream without the heavy, full feeling. |
Customizable | Control ingredients, sweetness, and flavors. |
Healthier Choice | Avoid artificial additives and excess sugars. |
Endless Flavor Adventures
Don't think that low fat means low flavor. Oh, no, no, no! That's where the fun begins. You can experiment with all sorts of fruits, spices, and extracts to create your own signature ice cream. Imagine a creamy mango sorbet, a rich chocolate mint, or a tangy lemon-lime creation. The possibilities are truly endless. This is your chance to be a dessert artist and create something truly unique. And the best part? It's all guilt-free, so you can go back for seconds (and maybe even thirds).
MustHave Ingredients for Low Fat Ice Cream in an Ice Cream Maker
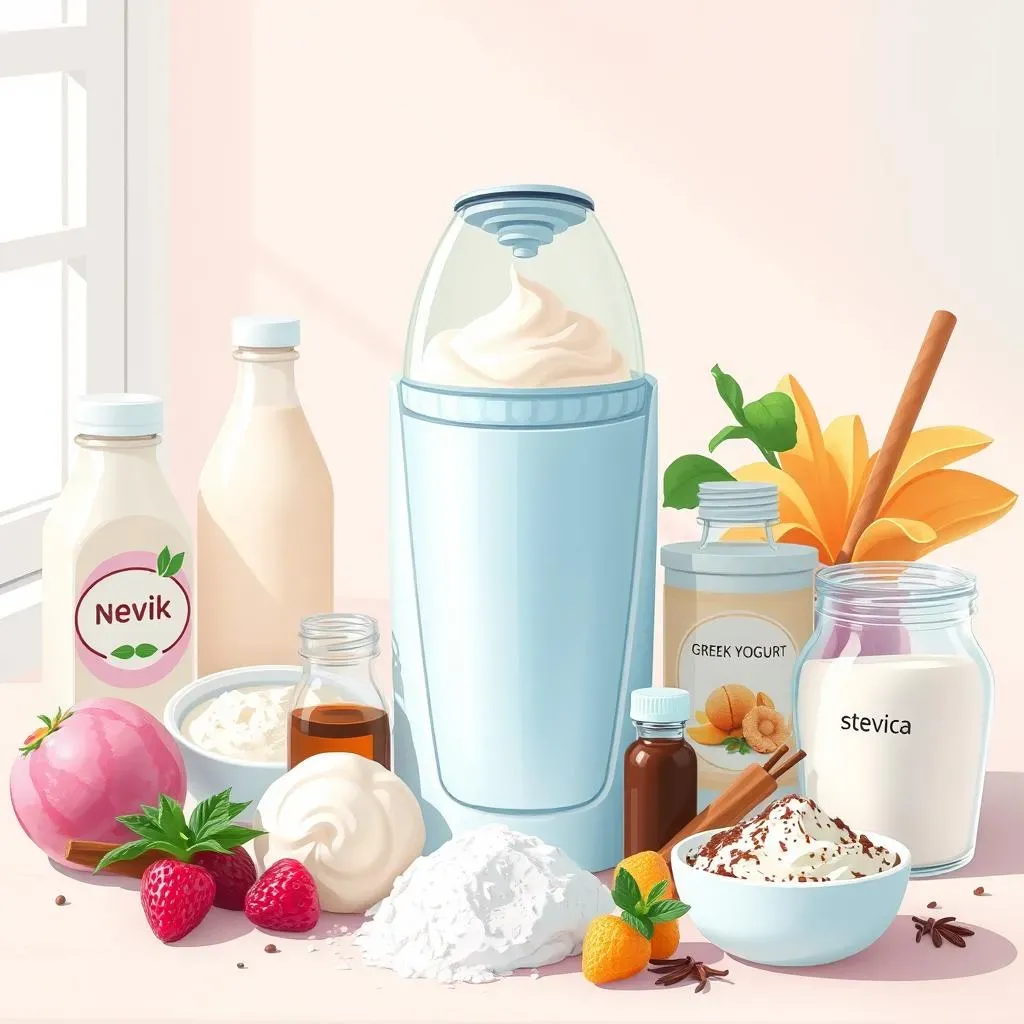
MustHave Ingredients for Low Fat Ice Cream in an Ice Cream Maker
The Creamy Base: Milk and Yogurt
so you want that smooth, dreamy texture, right? Well, the foundation of any good low-fat ice cream is the right combo of milk and yogurt. Now, I'm not talking about just any milk. We're ditching the whole milk for this, opting for 2% or even skim for a lighter base. But here's the secret weapon: Greek yogurt. It's thick, tangy, and packed with protein, giving your ice cream that creamy body we all crave. It's like the secret agent of the ice cream world, working hard to make sure your dessert isn't a watery mess. Trust me, this combo is a game-changer.
The ratio is key here. I usually go for about half milk and half Greek yogurt, but feel free to experiment and see what works best for your taste buds. Just keep in mind that the higher the fat content in your milk or yogurt, the richer the ice cream will be. If you are using skim milk, you might need to add a little bit of xanthan gum to help thicken it up, but we'll talk more about that later. This is about finding the perfect balance for your palate, and, of course, for your waistline.
Sweetness and Flavor Boosters
Next up, we need to talk about sweetness. Sugar is the usual suspect in ice cream, but we're going a different route. I love using liquid stevia or erythritol because they are low in calories and don't spike your blood sugar. You can also experiment with other natural sweeteners like honey or maple syrup, but keep in mind that they can add some extra calories and can sometimes change the texture. The key is to add the sweetener gradually and taste as you go. You can always add more, but you can't take it out.
And now for the fun part: flavor! This is where you get to let your creativity shine. Vanilla extract is a classic, but don't be afraid to explore other options like almond extract, peppermint extract, or even a splash of coffee. For chocolate ice cream, I love using unsweetened cocoa powder. It gives a rich chocolatey flavor without the extra sugar. You can also add spices like cinnamon or nutmeg for a warm, comforting flavor. The sky is the limit when it comes to flavoring your low-fat ice cream. So, go wild and have some fun!
Ingredient | Purpose | Options |
|---|---|---|
Milk | Base liquid | 2%, skim, almond, soy |
Greek Yogurt | Creaminess and protein | Non-fat, low-fat |
Sweetener | Adds sweetness | Stevia, erythritol, honey |
Flavorings | Adds flavor | Vanilla extract, cocoa powder, spices |
StepbyStep: Making Delicious Low Fat Ice Cream Recipes

StepbyStep: Making Delicious Low Fat Ice Cream Recipes
Prep Like a Pro
Alright, so you've got your ingredients, now it's time to get this ice cream party started! First things first, grab a good-sized mixing bowl. You're going to want to whisk together your milk and Greek yogurt until they're smooth and well combined. No one wants a lumpy ice cream base, so take your time and make sure it's nice and homogenous. Next, add your sweetener of choice – liquid stevia, erythritol, whatever floats your boat – and mix it in. Don't go crazy with the sweetener right away, start with a little and taste as you go. Remember, you can always add more, but you can't take it out. Finally, stir in your flavorings, like vanilla extract, cocoa powder, or a dash of cinnamon. It's like creating a potion, but one that ends with delicious, guilt-free ice cream.
Once everything is mixed, go ahead and pour your concoction into your ice cream maker. Now, if you don't have an ice cream maker, don't worry, I've got your back. You can pour the mixture into a freezer-safe container and freeze it for about 2-3 hours, stirring it every 30 minutes to break up the ice crystals. But seriously, an ice cream maker is a game-changer, and it's worth the investment if you plan to make ice cream often. It makes the whole process so much easier, and the texture is way smoother. Trust me on this one, it's a game-changer.
Churning to Perfection
so you've got your mixture in the ice cream maker. Now, the waiting game begins. Most ice cream makers will take about 20-30 minutes to churn your ice cream into that soft-serve consistency we all love. Just let it do its thing, and resist the urge to peek every five seconds. I know, it's hard, but patience is key. Once the ice cream is churned, it's going to be soft, like a thick milkshake. This is the point where you can add in any mix-ins, like chocolate chips, chopped nuts, or fruit pieces. I usually like to fold them in gently so they don't get all crushed up. Then, carefully transfer your ice cream to a freezer-safe container. I like to use those reusable ice cream tubs, but any airtight container will work.
Now for the final step, freezing. Pop your container into the freezer for another 2-3 hours, or until it's firm enough to scoop. This step is essential for getting that scoopable texture. If you want a super smooth and creamy texture, you can also try letting your ice cream sit out for 5-10 minutes before scooping. This softens it up a bit and makes it easier to serve. And there you have it, your very own homemade, low-fat ice cream, ready to be devoured. It's a labor of love, but so worth it when you take that first bite. I always feel so proud, like a mad scientist, but instead of creating monsters, I created delicious ice cream.
Step | Action | Notes |
|---|---|---|
1 | Mix Base | Whisk milk, yogurt, sweetener, and flavorings |
2 | Churn | Pour mixture into ice cream maker and churn |
3 | Add Mix-ins | Fold in any desired additions |
4 | Freeze | Transfer to container and freeze until firm |
Troubleshooting Your Low Fat Ice Cream Maker Creations

Troubleshooting Your Low Fat Ice Cream Maker Creations
Ice Cream is Too Icy
so you've followed the recipe, churned your heart out, and you're ready for that first spoonful. But wait, your ice cream is icy, not creamy? Ugh, the worst! Don't worry, this is a common issue with low-fat ice cream. The main culprit? Too much water content. Remember how we used 2% or even skim milk? Well, that lower fat content means more water, which can crystallize during freezing. But fear not, there are ways to combat this. First, make sure you're using the right amount of sweetener. Sweeteners like stevia or erythritol can also help lower the freezing point, preventing those pesky ice crystals. Also, adding a touch of xanthan gum can help thicken the mixture and prevent it from turning into a block of ice.
Another thing to watch out for is the temperature of your freezer. If your freezer is too warm, your ice cream will take longer to freeze, which can lead to more ice crystal formation. Make sure your freezer is set to the right temperature, usually around 0°F (-18°C). You can also try pre-chilling your ice cream maker bowl for longer than recommended. This gives your ice cream a head start in the freezing process. And lastly, if you're using the non-ice-cream-maker method, be sure you're stirring frequently enough to break up those ice crystals. It might be a bit of a pain, but it's worth it for that creamy texture. It's all about finding the right balance of ingredients and temperature.
Ice Cream is Too Soft
Alright, so your ice cream isn't icy, but it's also not firm enough? It's like a thick milkshake, and you're wanting that perfect scoop. This can happen when the ratio of ingredients is off or if the ice cream hasn't frozen long enough. If your ice cream is too soft, it could mean you used too much liquid or not enough thickener. Try using a little less milk and a bit more Greek yogurt in your next batch. The Greek yogurt will not only add protein but also provide that much-needed thickness. Also, make sure you're not adding too many mix-ins that can introduce extra moisture. Things like fresh fruits can make your ice cream softer.
Another reason why your ice cream might be too soft is because it hasn't had enough time in the freezer. Even after churning, your ice cream needs a few hours to firm up. I usually give it at least 2-3 hours in the freezer after churning. And sometimes, it needs even longer. If you are in a hurry and have a blast freezer, you can try that for 30 minutes. If you're still having trouble, check your freezer temperature again. If it's too warm, your ice cream will struggle to firm up properly. And one final tip, make sure your container is sealed tightly. If air gets in, it can mess with the freezing process. It's all about creating the perfect environment for your ice cream to set up.
Problem | Possible Cause | Solution |
|---|---|---|
Too Icy | Too much water, not enough sweetener, freezer too warm | Add more sweetener, use less liquid, lower freezer temp |
Too Soft | Too much liquid, not enough thickener, not frozen enough | Use less milk, more yogurt, longer freeze time |
Flavor is Off
So, you've nailed the texture, but the flavor is just not quite right? Maybe it's too bland, too sweet, or just off. This is where your taste buds become your best friend. If your ice cream is too bland, it probably means you need to add more flavorings. Don't be shy with the vanilla extract, cocoa powder, or spices. Start with a little and taste as you go. You can always add more, but you can't take it out. If you're using fresh fruit, try roasting it first to intensify the flavor. It's like giving your fruit a little spa day, and it comes out tasting amazing.
Now, if your ice cream is too sweet, dial it back on the sweetener. Taste as you go, and don't be afraid to experiment with different types of sweeteners. Sometimes, a blend of stevia and erythritol can give you the perfect level of sweetness without being overpowering. And if you're using honey or maple syrup, remember that they can add a stronger flavor that might not always work well with certain ingredients. And remember, if you are using a new sweetener, you might need to adjust the amount compared to what you are used to. It's all about finding that sweet spot where the flavors work in perfect harmony. It's like composing a symphony, but instead of music, you're creating a delicious dessert.
Your Low Fat Ice Cream Adventure Awaits
So, there you have it – a complete guide to making fantastic low fat ice cream in your very own ice cream maker. From understanding the importance of the right ingredients to mastering the techniques, you're now equipped to create healthier, delicious treats whenever the craving hits. Remember, it's about finding joy in the process and experimenting to find your perfect flavor combinations. Don't be afraid to tweak the recipes, add your favorite mix-ins, and most importantly, share your creations with friends and family. Happy churning, and here's to many more scoops of guilt-free goodness!