Table of Contents
Ever craved a delicious loaf cake without the guilt? Then you're in the right place! This article is your ultimate guide to the wonderfully versatile low-fat yogurt loaf. We'll explore the secrets to baking a moist, flavorful loaf using low-fat yogurt, uncovering the best yogurt types and sharing expert tips and tricks for perfect results every time. Forget dry, disappointing cakes; we're diving into a world of texture and taste, proving that healthy can absolutely be delicious. Prepare to be amazed by the simple variations you can create, transforming this basic recipe into a personalized masterpiece. Whether you're a seasoned baker or a kitchen novice, this exploration of the low-fat yogurt loaf will empower you to create a healthy treat that’s as satisfying as it is guilt-free. Get ready to bake your way to a healthier, happier you, one delicious slice at a time!
The Best LowFat Yogurt for Your Loaf
The Best LowFat Yogurt for Your Loaf
Understanding Fat Content and its Impact
So, you're embarking on your low-fat yogurt loaf adventure! Fantastic. The first thing to know is that "low-fat" doesn't mean flavorless. The fat content in yogurt significantly impacts the final texture and moisture of your loaf. Too little fat, and you risk a dry, crumbly result. Think of the fat as the glue that holds everything together, giving your loaf that satisfyingly moist crumb. We're not aiming for a dense brick; we want a light and fluffy texture.
Many people mistakenly believe that completely fat-free yogurt is the healthiest choice. However, a small amount of fat contributes to the flavor and richness of the yogurt, and consequently, your loaf. Think of it like this: a touch of butter in a cake makes it more delicious, right? The same principle applies here. We're aiming for a balance – enough fat to keep it moist, but not so much that it overshadows the other flavors.
Yogurt Type | Approximate Fat Percentage | Impact on Loaf |
|---|---|---|
Nonfat Plain Yogurt | 0% | May result in a drier loaf. Needs extra moisture adjustments. |
Low-fat Plain Yogurt | 2% | Good balance of moisture and lightness. Often a preferred choice. |
Greek Yogurt (Low-fat) | 2-5% | Adds creaminess and protein, but might require slight recipe adjustments. |
Choosing the Right Type of Yogurt
Now, let's talk yogurt types. Plain, unsweetened yogurt is your best friend for baking. Flavored yogurts often contain added sugars and thickeners that can interfere with the baking process. Stick to plain for the best results and control over the sweetness of your final product. You can always add your own flavorings later – vanilla extract, lemon zest, or even a touch of maple syrup are all excellent choices. Remember, we're aiming for a perfectly balanced flavor profile, not a sugar bomb disguised as a healthy treat.
Greek yogurt, with its thicker consistency and higher protein content, offers a unique advantage. It can create a denser, richer loaf, but you might need to adjust the liquid content in your recipe slightly to compensate. Experiment to find what works best for you! Don't be afraid to try different brands and fat percentages to discover your perfect low-fat yogurt loaf recipe. Baking is an adventure; embrace the experimentation!
- Plain, unsweetened yogurt is best for baking.
- Greek yogurt adds richness and protein but may need recipe adjustments.
- Avoid flavored yogurts unless you're aiming for a specific flavor profile.
Beyond the Basics: Exploring Other Yogurt Options
While plain, low-fat yogurt is a great starting point, don't limit yourself! Consider exploring other options within the "low-fat" category. Some yogurts are specifically marketed as being suitable for baking, often with a slightly higher fat content for optimal moisture. These are excellent options to explore if you find that your low-fat loaves are consistently too dry. Look for yogurts with a smooth and creamy texture; this will translate to a better texture in your final baked good.
Don't be afraid to experiment! The beauty of baking lies in the creative process. Try different brands and types of low-fat yogurt to see how they affect the final product. Keep notes on your findings – what worked best, what didn't, and why. This will help you refine your recipe and develop your own signature low-fat yogurt loaf. Remember, every baker has their own preferences, and there's no single "right" answer when it comes to choosing the perfect yogurt.
Baking the Perfect LowFat Yogurt Loaf: Tips and Tricks
Baking the Perfect LowFat Yogurt Loaf: Tips and Tricks
Mastering the Mixing Technique
Alright, let's talk technique. Many novice bakers overmix their batter, leading to a tough, dense loaf. With a low-fat yogurt loaf, this is even more crucial to avoid. Think of it like this: overmixing develops the gluten in the flour, making the loaf tough. We want a tender crumb, so gentle mixing is key. Combine the wet ingredients first, then gradually add the dry ingredients, mixing just until everything is incorporated. A few lumps are perfectly acceptable; in fact, they're preferable to a completely smooth batter. Stop mixing as soon as the dry ingredients are just moistened, and resist the urge to overwork the dough.
Another important tip is to avoid overbaking. Overbaked loaves are dry and lack that desired moistness. Start checking for doneness a few minutes before the recipe’s recommended time. Insert a toothpick into the center; if it comes out clean or with just a few moist crumbs attached, your loaf is ready. If it’s still gooey, give it a few more minutes, checking frequently. Remember, it’s better to slightly underbake than overbake a low-fat yogurt loaf.
Mixing Tip | Why It Matters |
|---|---|
Gentle mixing | Prevents a tough, dense loaf |
Don't overmix | Maintains a tender crumb |
Check for doneness early | Avoids dryness |
Prepping Your Pan and Baking Like a Pro
The success of your low-fat yogurt loaf hinges not just on the mixing technique, but also on the preparation of your baking pan. Greasing and flouring the pan is crucial to prevent sticking, ensuring that your loaf releases easily. Use a non-stick cooking spray or rub the pan with butter or oil and then dust it generously with flour. This simple step makes all the difference in the world. Consider lining the bottom of your pan with parchment paper for extra insurance. This makes removing the loaf even easier, particularly if you're using a decorative pan.
And finally, let's talk oven temperature. Ensure your oven is preheated to the correct temperature before placing your loaf inside. This ensures even baking and prevents uneven browning or a soggy bottom. Using an oven thermometer to verify the accuracy of your oven's temperature is a great idea, especially if you're using a new or unfamiliar oven. Consistent temperature is key to a perfect low-fat yogurt loaf. Remember, patience and attention to detail are the hallmarks of a successful baker.
- Grease and flour your pan well.
- Consider lining the pan with parchment paper.
- Preheat your oven to the correct temperature.
- Use an oven thermometer for accuracy.
Variations on the LowFat Yogurt Loaf Theme
Variations on the LowFat Yogurt Loaf Theme
Adding Flavor and Fun: Beyond the Basics
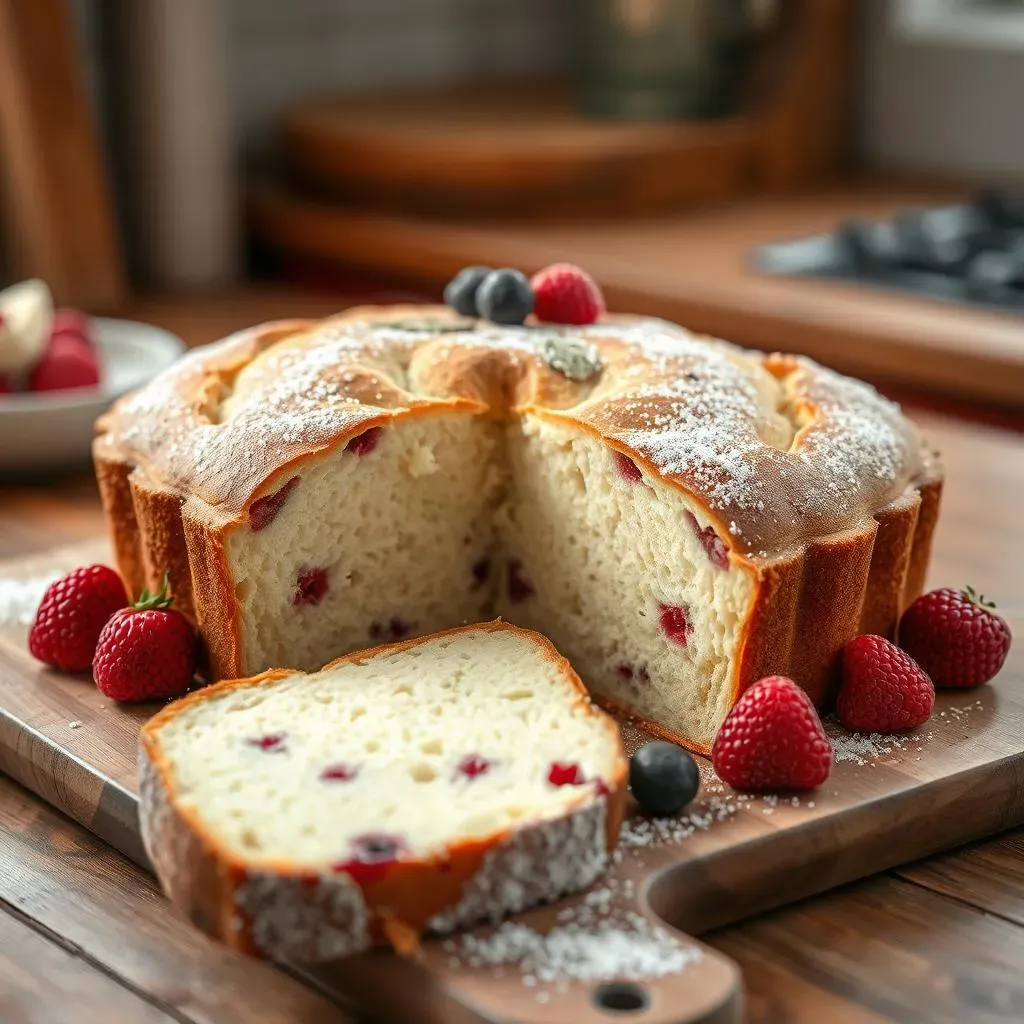
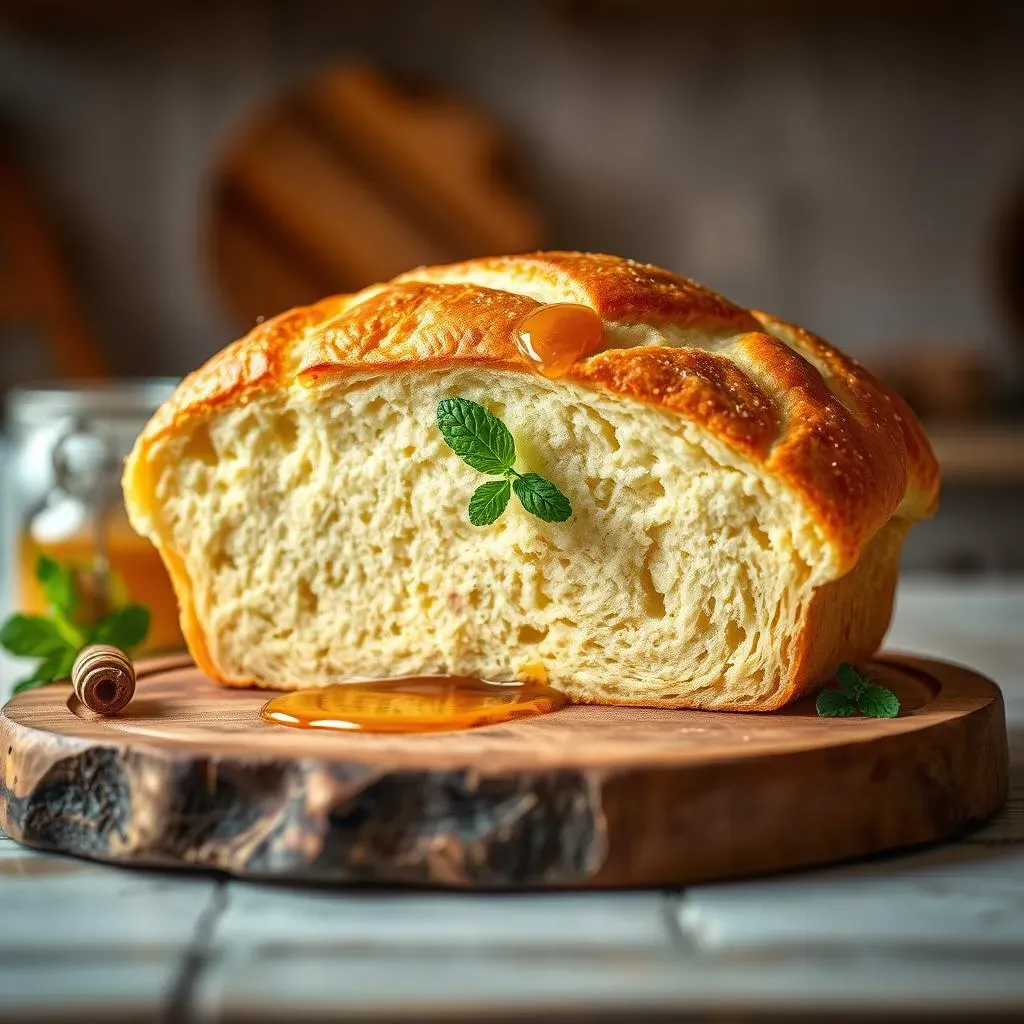
Okay, so you've mastered the basic low-fat yogurt loaf. Now it's time to get creative! The beauty of this recipe lies in its adaptability. Think of the basic recipe as your blank canvas—ready to be transformed with a burst of flavor and texture. Let's start with simple additions. A teaspoon of vanilla extract elevates the flavor profile beautifully, adding a warm, comforting note. A dash of cinnamon creates a comforting spice cake, perfect for autumn. For a citrusy twist, consider adding lemon or orange zest; the brightness cuts through the richness of the yogurt beautifully.
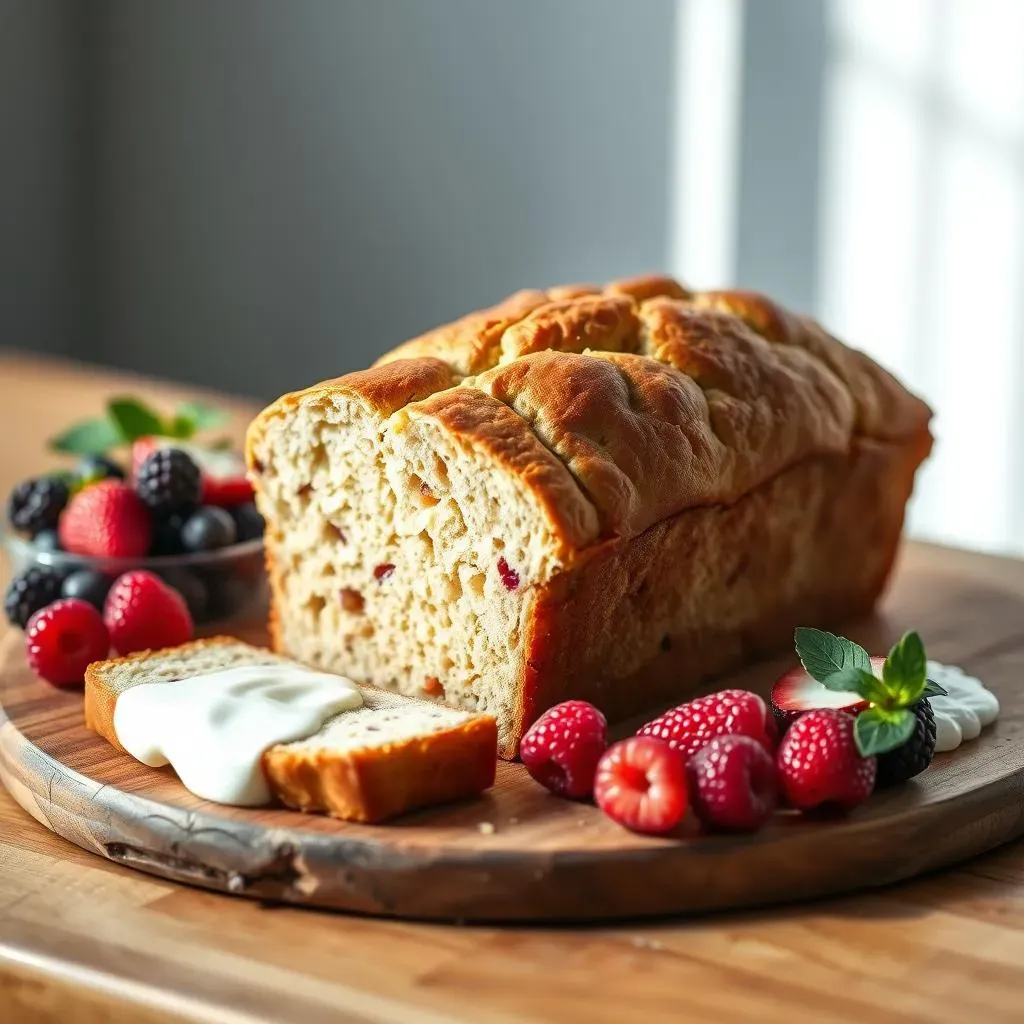
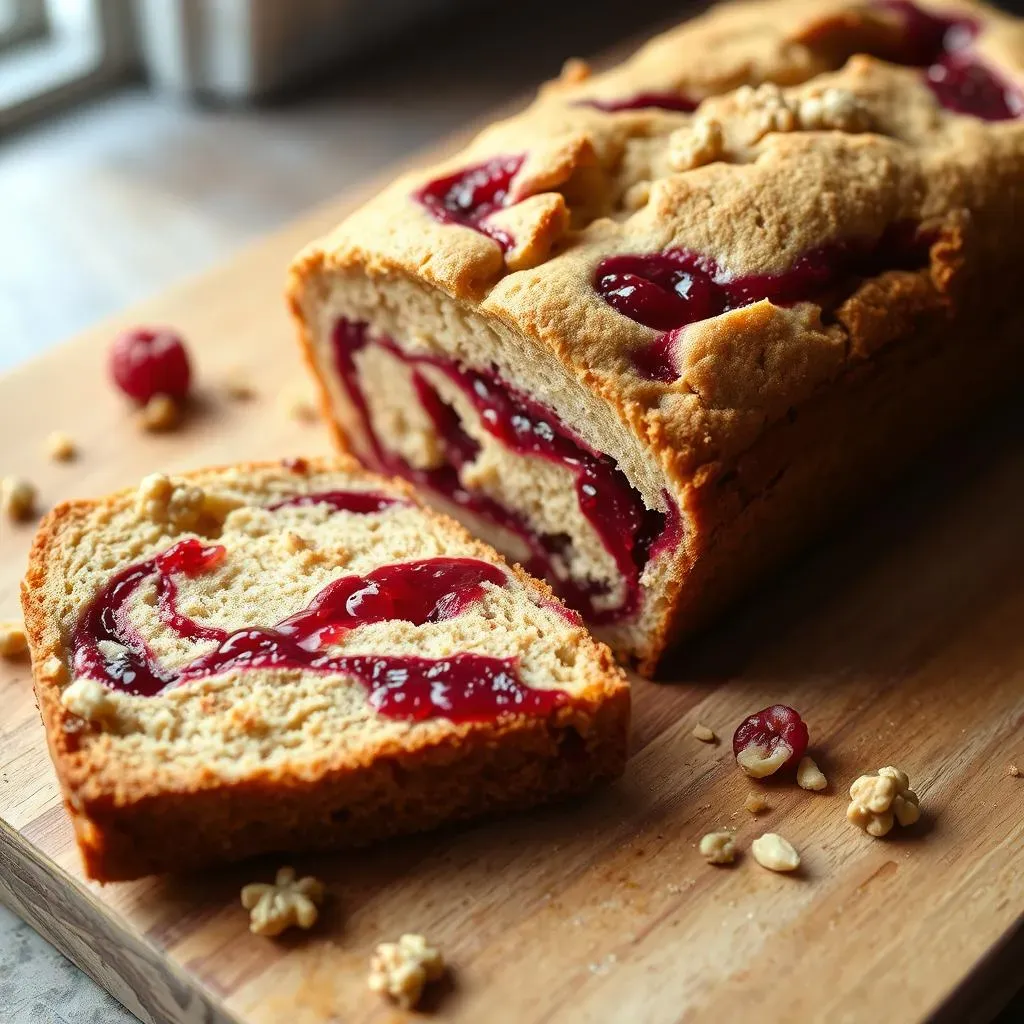
But why stop there? Let's explore the world of mix-ins! Chocolate chips are an obvious choice, but consider chopped nuts for added crunch, dried fruits for a chewy texture, or even a swirl of jam for a burst of fruity sweetness. The possibilities are endless! Don’t be afraid to experiment with different flavor combinations to find your perfect match. The key is to balance flavors and textures. A little bit of planning goes a long way in creating a truly unique and delicious low-fat yogurt loaf.
Mix-in | Flavor Profile | Texture |
|---|---|---|
Chocolate Chips | Rich, chocolatey | Chewy |
Chopped Nuts | Nutty, earthy | Crunchy |
Dried Fruits | Fruity, sweet | Chewy |
Jam Swirl | Fruity, sweet | Smooth |
From Loaf to Muffins: Adapting Your Recipe
Who says a low-fat yogurt loaf has to be a loaf? This recipe is incredibly versatile and can easily be adapted to make delicious muffins! Simply divide the batter evenly among greased muffin tins, filling each about two-thirds full. Reduce the baking time significantly—check for doneness after about 15-20 minutes, depending on your oven and muffin tin size. This is perfect for portion control, making it ideal for meal prep or individual servings. Plus, muffins are just inherently fun! They're perfect for a quick breakfast, an afternoon snack, or even a delightful dessert.
Another fun variation is to create a marble effect by dividing your batter and adding cocoa powder to half of it. Swirl the two batters together in the pan or muffin tin for a visually appealing and delicious treat. You could even create mini loaves by using smaller loaf pans. Consider experimenting with different pan sizes to see how it affects the baking time and the overall texture. Remember to adjust baking times accordingly, and always check for doneness with a toothpick before removing them from the oven. The possibilities are as vast as your imagination!
- Muffins: Reduce baking time significantly.
- Marble effect: Add cocoa powder to half the batter and swirl.
- Mini loaves: Use smaller loaf pans.
- Always adjust baking times based on pan size.